- This article has been tagged among the Pages that need revision.
| This article or section needs to be cleaned up to a higher standard of quality. |
| Dreadsteed | |
|---|---|
| |
| Usable by | |
| Class | Warlock |
| Properties | |
| Type | Utility |
| School | Shadow |
| Cooldown | None/Global Cooldown |
| Other information | |
| Ranks | 1 |
| Related buff | |
| |
- "The subjugation of a Xorothian Dreadsteed is a true measure of power."
—Mor'zul Bloodbringer[1]


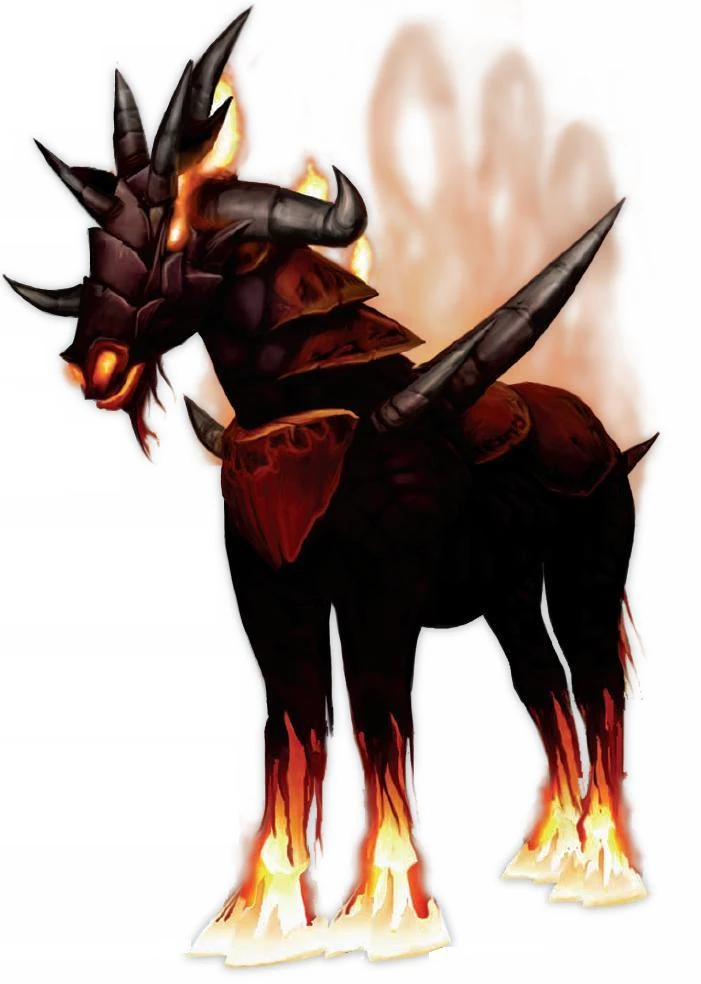
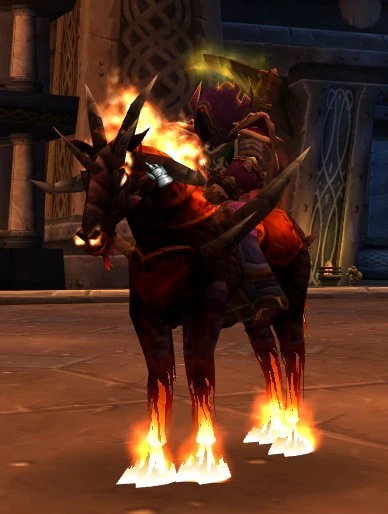
The dreadsteed of Xoroth is the level 60 epic warlock ground mount. The Summon Dreadsteed ability is now learned from the warlock trainer at level 40 and requires both Journeyman riding skill (from the riding trainer) and the Summon Felsteed ability to learn; the quest chain is no longer mandatory. However, note that should you choose to do the quest chain, you do not need to train your riding skill to Journeyman. As with all other epic ground mounts in the game, the dreadsteed gives the warlock a speed increase of 100%.
Xoroth is the home planet of these fiery, horse-like demons, who serve as the mounts of the Dreadlords. The finest belong to the Nathrezim Dreadlord, Lord Hel'nurath the Stable Keeper.
The dreadsteed quest[]
Although the option now exists to learn to summon their epic mounts from the trainer at level 40, the traditional quest chain to unlock the dreadsteed at level 60 still exists. It begins with the former Demon Trainers found in Orgrimmar, Ironforge, Stormwind, or the Undercity.
They will have a quest directing you to speak with a human warlock named Mor'zul Bloodbringer in the Burning Steppes. Mor'zul is on a hill across the road from the Altar of Storms, which is in extreme northwestern Burning Steppes, west of Blackrock Mountain. He will send you on a long and expensive sequence of adventures culminating in your learning the Summon Dreadsteed spell.
Quest overview[]
| The Dreadsteed Quests | ||||||
|---|---|---|---|---|---|---|
| Lord Banehollow | Mor'zul Bloodbringer | |||||
| Ulathek the Traitor | Rage of Blood | |||||
| Xorothian Stardust | Wildeyes | |||||
| Imp Delivery | Bell of Dethmoora | Wheel of the Black March | Doomsday Candle | |||
| Arcanite | ||||||
| Dreadsteed of Xoroth | ||||||
Mor'zul's servant, a goblin warlock named Gorzeeki Wildeyes, will have to craft several items to allow you to summon and capture a Dreadsteed of Xoroth — a bell, a wheel, a candle, a scroll, and a stone. To that end, he sends you on a number of quests to obtain the arcane raw materials for these items. To create the scroll, you must complete the following two quest chains:
 [60] Mor'zul Bloodbringer
- [60] Rage of Blood (30x[Raging Beast's Blood])
- [60] Wildeyes
- [58] Lord Banehollow (6)
- [58] Ulathek the Traitor
- [60] Xorothian Stardust (150)
Once the first questline is completed, the following materials quests become available:
- [60] Bell of Dethmoora (2x[Elixir of Shadow Power])
- [60] Wheel of the Black March (6x[Large Brilliant Shard] 25x[Dark Iron Ore])
- [60] Doomsday Candle (3x[Black Dragonscale])
- [60] Arcanite (1x[Arcanite Bar] After all three materials quests are completed)
In addition, once both of the introductory quest lines are done, the following will be available (note: the materials quests are not required for this):
- [60] Imp Delivery
Finally, once all the above quests have been completed, the summoning quest becomes available:
- [60] Dreadsteed of Xoroth (250 only if you don't know another Warlock that already has J'eevee's Jar, Black Lodestone, and Xorothian Glyphs)
Detailed walk-throughs for each chain are given below.
Ink for the Scroll[]
- [60] Mor'zul Bloodbringer
- The Demon Trainer in Orgrimmar or Ironforge sends you to speak to Mor'zul.
- [60] Rage of Blood
- Mor'zul tells you that creating the ink with which to scribe the scroll will require 30 Raging Beast's Blood, which drop from the various Owlbeasts in Winterspring.
- [60] Wildeyes
- Mor'zul packages the blood into Case of Blood and wants you to deliver it to Gorzeeki Wildeyes — luckily, Wildeyes is standing just a few feet away.
Completing this sequence allows Wildeyes to make the ink for the scroll, but not the paper — it has to be infused with Xorothian Stardust from the second quest line. Also, Mor'zul has three quests for you, which can be completed in any order, about gathering materials for the bell, wheel, and candle.
Bell, Wheel, and Candle (materials branch)[]
These three quests and the one that follow them seem designed to provide income for high-level crafters. The first three, as mentioned, can be done in any order, and once they're turned in, the fourth one becomes available. Since there may be considerable expense involved here, it's good that you can work on the other branch of the overall quest (the Xorothian Glyphs branch) at the same time, although there's some expense involved there as well. But in this branch, you may well have a profession that will help you here, or you may be able to call on the help of friends or guildmates for the materials.
- [60] Bell of Dethmoora
Mor'zul tells you that to create the Bell of Dethmoora, you must bring Wildeyes 2 Elixir of Shadow Power. This is a fairly high-level Alchemy recipe, but even if you're not an Alchemist, they are usually available at an Auction House. You don't get an item called the Bell of Dethmoora, per se, at any point, but it does appear in the summoning ritual.
- [60] Wheel of the Black March
In order to create the Wheel, Wildeyes will need 6 Large Brilliant Shard and 25 Dark Iron Ore. Here we have an item that requires a fairly high level in a crafting profession and another that requires a fairly high level in a gathering profession. Like the Bell, there's no actual Wheel item to tote around after turning this in.
- [60] Doomsday Candle
Wildeyes needs 3 Black Dragonscale to make the Candle. More about the Bell, Wheel, and Candle later. Once you have completed these three quests, in any order, Wildeyes gives you a fourth one:
- [60] Arcanite
Finally Wildeyes will have to make you a Black Lodestone, which requires 1 Arcanite Bar. Once you turn this in, you're done with the materials sequence!
Xorothian Stardust[]
As mentioned above, there's another sequence that can be done concurrently while collecting the ink for the scroll. Wildeyes informs you that the scroll's paper needs to be infused with Xorothian Stardust before the proper glyphs can be inscribed upon it. This sequence of quests is about acquiring this rare material:
- [58] Lord Banehollow
Lord Banehollow is a Dreadlord currently dwelling among the remnants of the Shadow Council in Jaedenar, Felwood. He is also the only being on Azeroth known to possess Xorothian Stardust. Unfortunately, the denizens of Jaedenar are hostile to anyone who is not their ally. However, Wildeyes has Shadowy Potions that can fool them into thinking you're one of them, and he'll gladly sell 3 of them to you for 6 gold. You will probably only have to use 1 of them, though.
Buy the potions, then take 150![]() with you to Felwood. Once you get to Jaedenar, drink one of the potions and head down into Shadow Hold. Everyone you meet will be Friendly to you for the next 20 minutes, which should be plenty of time. The only things that won't be Friendly to you are the mindless oozes (and a succubus named Rakaiah in the room after them), which you can probably avoid for the most part as you descend to the very bottom of Shadow Hold and speak to Lord Banehollow, who has a quest for you ...
with you to Felwood. Once you get to Jaedenar, drink one of the potions and head down into Shadow Hold. Everyone you meet will be Friendly to you for the next 20 minutes, which should be plenty of time. The only things that won't be Friendly to you are the mindless oozes (and a succubus named Rakaiah in the room after them), which you can probably avoid for the most part as you descend to the very bottom of Shadow Hold and speak to Lord Banehollow, who has a quest for you ...
- [58] Ulathek the Traitor
Banehollow won't sell you any Stardust until you do something for him: his rival back on Xoroth, Lord Hel'nurath, is plotting against him and has a spy in Shadow Hold, an orc named Ulathek. Banehollow knows you want to steal one of Hel'nurath's dreadsteeds, and he's perfectly willing to help you humiliate Hel'nurath as long as you do something in exchange — you have to find Ulathek, kill him, and bring back his heart. Finding him isn't too difficult; he's in one of the side rooms you passed by getting down to Banehollow. When you speak to him, he will turn hostile and attack, as will his four guards (you might want to do something to keep them off you long enough to kill Ulathek and loot his still-beating heart). Kill Ulathek and take his heart back to Banehollow, who will be happy with you, as happy as a Dreadlord snacking on the freshly-ripped-out heart of his enemy. Mmm mmm.
It would be prudent to summon your voidwalker to tank the 4 other mobs while you burn Ulathek down. After you have slain him, loot him quickly and jump down to the right when you get out of his cave and keep running back to Lord Banehollow. A smart thing to do is to sacrifice your voidwalker.
If you're a Demonology warlock, your felguard should be able to tank the mobs nicely, and a sacrifice shouldn't be required. The other mobs in Jaedenar will still be friendly to you. (Apparently they don't care much for Ulathek either).
Alternatively, instead of talking to Ulathek, right-click your Taint of Shadow buff to dismiss the effect. Ulathek and his guards will attack you. Now, kill Ulathek quickly and drink another Shadowy Potion once he's dead. The guards will instantly stop attacking you, allowing you to casually loot the corpse and go complete your quest. Note: you must manually remove the buff in order for this to work.
- [60] Xorothian Stardust
Banehollow will finally allow you to purchase some Xorothian Stardust from his lackey Ur'dan who is standing next to him for 150 gold. You're done in Jaedenar; take the Stardust back to Wildeyes in the Burning Steppes.
Scholomance[]
Once you have obtained both the ink for the scroll and the Xorothian Stardust, the following quest becomes available:
- [60] Imp Delivery
Wildeyes now tells you that the parchment (which he doesn't make you pay for, incredibly) must be infused with the Stardust and the glyphs must be inscribed upon it. He can't do it here - the only place with the equipment is in Ras Frostwhisper's lab in the Scholomance. And he isn't going with you - instead, he has a highly-trained imp named J'eevee who knows the procedure, and he won't even charge you rent to borrow Imp in a Jar. Take the jar, form a party of 5, and go to Scholomance to fight your way into Ras's lab, where you can use the jar at one of the tables to the right; and J'eevee will come out and do his thing, completing your quest. You don't actually have to kill Ras to do this; the tables are far enough away from him that he can't see you doing this. This is the same Alchemy Lab that Alchemists had to go to in order to make Flasks before the ones in Shattrath City were available.
The Imp in a Jar tooltip specifically says "Scholomance Alchemy Lab". While you can open the jar at the Blackwing Lair and Shattrath City Alchemy Labs, they will not give you quest completion. It must be in Scholomance.
Once you're done in Scholomance, return to Wildeyes.
Entering Dire Maul West[]
The last step to obtain the dreadsteed is to enter Dire Maul West and complete the ritual. Someone in your party will need the Crescent Key to unlock the external door to the instance as well as to unlock a door once inside the instance. A rogue with 300 lockpicking is also able to open the door. A warlock may also use Hellfire to commit suicide, resurrect on inside of door, and open the door from within.
The Ritual[]
- [60] Dreadsteed of Xoroth
Mor'zul hands you a book, Mor'zul's Instructions, that describes all of this. Here is the gist of it. First, you must purchase J'eevee's Jar 150![]() , Black Lodestone 50
, Black Lodestone 50![]() , and Xorothian Glyphs 50
, and Xorothian Glyphs 50![]() from Wildeyes — he may be a goblin warlock, but he's still a goblin, so he's not giving you anything for free.
It will be difficult to find a full party for Dire Maul West these days, so it will probably be necessary to bring one or two high-level characters with you instead. You will have to kill the boss Immol'thar, because you're going to use the circular dais he was imprisoned in as your summoning circle. You must first lower the energy shield encasing him by locating the 5 power crystals throughout the instance (two are located in the room boss is in) and killing the elementals powering it. It is recommended to have at least 10-15 Soul Shards before you fight Immol'thar.
from Wildeyes — he may be a goblin warlock, but he's still a goblin, so he's not giving you anything for free.
It will be difficult to find a full party for Dire Maul West these days, so it will probably be necessary to bring one or two high-level characters with you instead. You will have to kill the boss Immol'thar, because you're going to use the circular dais he was imprisoned in as your summoning circle. You must first lower the energy shield encasing him by locating the 5 power crystals throughout the instance (two are located in the room boss is in) and killing the elementals powering it. It is recommended to have at least 10-15 Soul Shards before you fight Immol'thar.
Once your party has defeated Immol'thar and rested/rebuffed, activate J'eevee's Jar. The imp has your three ritual nodes (the Bell, Wheel, and Candle) and sets them up; he also starts the process of forming the Circle of Greater Summoning. This process will attract waves of demons; groups of Xorothian Imps and occasional Dread Guards (felguards) will come to attack.
Fortunately the three artifacts will help. The Bell of Dethmoora restores health and mana to any Warlocks in the party. (Ritual Bell Aura restores 150 health and 150 mana, though it's uncertain of how often it procs.) The Wheel of the Black March protects all party members (Black March Blessing absorbs 100 points of damage from every hit on anyone in the party). The Doomsday Candle burns anyone not in the party with fire damage (Ritual Candle Aura, 250 damage per second); and because of the Candle, you can ignore the imps. The damage they do is minimal when the Wheel is active, and they die fairly quickly when the Candle is active. The party should therefore focus on the Dread Guards; there will be up to of 10 or 11 of them, and sometimes they spawn more than one at a time. It can be beneficial to enslave the felguards as they come.
You, however, should focus on the Bell, Wheel, and Candle, which need recharging from time to time (they sag, tilt, and make a noise to let you know when they need attention); this requires the Black Lodestone, but recharging an item with it costs a Soul Shard. The most difficult part is recharging the artifacts (Fix Ritual Node) because it requires a 3-second casting time and is interrupted by any damage, even the damage the imps do, so you either need party members who are good at pulling aggro off you, or you need to have voidwalker to taunt them off, or some similar solution. In addition, they spawn in greater numbers than before; around 10 or 11 over the course of the ritual. Just keep everything going until the circle is complete. If all three of the ritual nodes are allowed to fail completely, the ritual will end and will have to be restarted. Any warlock in the party who has a Black Lodestone and a Soul Shard to spend can recharge a failing node; however, it doesn't have to be the one who started the ritual. It takes around 10-15 Soul Shards to keep them all going until the circle is complete.


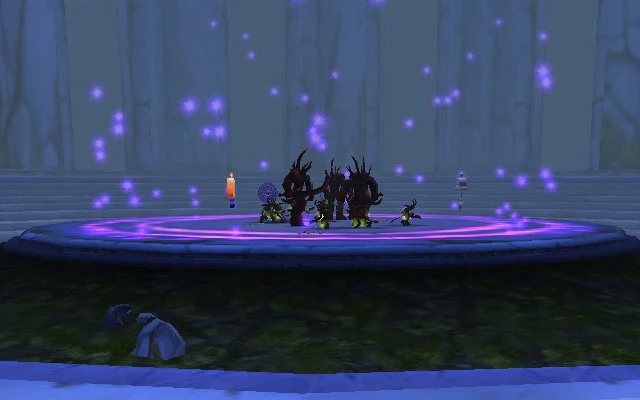
Nine symbols and vortex: success!
The circle consists of 9 glowing symbols on the floor, which will slowly appear one at a time. It takes about 6 minutes for all 9 to appear, and as soon as they're all visible, there will be a swirling, red vortex around the circle, and no more demons will come. At that point, if you don't want to kill the rest of the demons, run out of the circle - the demons will chase you, but will disappear when they reach the edge of the circle.
If you wipe, don't worry - as long as at least one of the nodes is still up, the symbols will keep appearing, and when the 9th one appears the circle becomes complete as usual. Just release and run back. If there are demons in the completed circle (it's obvious from the pink vortex that exists there now), just run up and lure them out - they will disappear, and you have your circle ready.
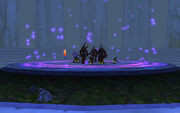
Success, despite a wipe
You now have an opportunity to rest, heal, and rebuff. The next step doesn't start until you activate your Xorothian Glyphs.
When you're ready, use the Glyphs. A portal opens, and a Xorothian Dreadsteed appears which the party must fight and kill. When the dreadsteed is at about 50% health, Lord Hel'nurath himself appears. He hates people who steal his horses, which is basically what you're doing, so you and your friends have to kill him too. He is, however, the only add in this fight.
Once both targets have been taken down, you can do the last step: talk to the spirit of the dreadsteed. It will teach you the Summon Dreadsteed spell. (In fact, until the spirit despawns you can have warlocks join the group, get summoned to the circle, talk to the spirit, and complete the quest, as long as they're done with every quest in the series but "Dreadsteed of Xoroth." They'd miss out on the ritual, though, which is fun.) Lord Hel'nurath drops some interesting loot, too.
You are now done! Two notes: First, J'eevee's Jar, the Black Lodestone, and the Xorothian Glyphs aren't used up in the process. You can help other warlocks get the dreadsteeds by going to Dire Maul with them (once they've finished all the steps up to that point) and using your three items, thus saving them 250![]() . Second, more than one warlock can complete the quest at the same time. It may be a good idea to have a couple along anyway to keep the ritual nodes up; it's nice to know that both can complete the quest. However, remember that any warlock who plans to help maintain the bell/wheel/candle must have a Black Lodestone 50
. Second, more than one warlock can complete the quest at the same time. It may be a good idea to have a couple along anyway to keep the ritual nodes up; it's nice to know that both can complete the quest. However, remember that any warlock who plans to help maintain the bell/wheel/candle must have a Black Lodestone 50![]() in order to be able to recharge them.
in order to be able to recharge them.
Total materials list[]

Dreadsteed
The final materials list is as follows:
- 406 (+ cost for crafting mats) in total (or 156 (+ cost for crafting mats) and a warlock with the three ritual components accompanying you to the western wing of Dire Maul)
- 3 Shadowy Potion (6) (Buys 3)
- Xorothian Stardust (150)
- J'eevee's Jar (150) (Reusable)
- Black Lodestone (50) (Reusable)
- Xorothian Glyphs (50) (Reusable)
- 2 Elixir of Shadow Power (Alchemist)
- 6 [Ghost Mushroom]
- 2 [Crystal Vial]
- 3 Black Dragonscale (Skinner)
- 6 Large Brilliant Shard (Enchanter)
- 25 [Dark Iron Ore] (Miner)
- 1 [Arcanite Bar] (Alchemist)
Patch changes[]
- Template:Patch 3.2.0
- Template:Patch 3.0.3
- Template:Patch 3.0.2
- Patch 1.12.1 (patch date:2006-09-26): The mount system was re-vamped and the Dreadsteed quest chain changed to also give Journeyman riding skill.
- Patch 1.6.0 (patch date:2005-07-12): New icon.
- Patch 1.4.0 (patch date:2005-05-05): Added.
External links[]
References[]
- ↑ TCG Scourgewar, 96
| |||||||||||
| |||||||||||||||||
| ||||||||
da:Dreadsteed es:Dreadsteed fr:Destrier de l'Effroi